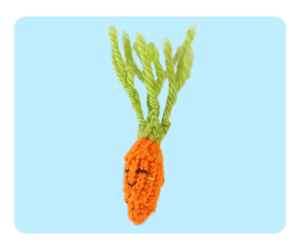
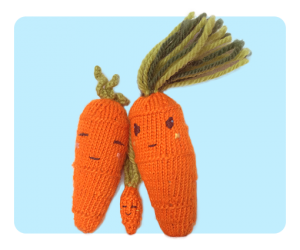
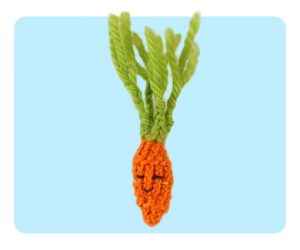
“Mommy, where is the baby?”, said my 3yo son after looking at the finished Sweet Carrot & Cool Carrot together. Well, that’s how this Baby Carrot came about. Baby Carrot is very tiny — knitting him was quick and easy (he is like a miniature version of the other carrots). However, I gave him a different hair for fun, the green tops are cut slightly uneven and braided. I left the green tops long, but I think it will look good too if cut short.
Difficulty Level:
![]()
Skills Required:
CO: Cast On
DPN: ability to knit in the round
K: Knit
M1: Make 1 stitch
P: Purl
K2tog: Knit 2 stitches together as 1
Finished Size:
3.5cm tall without carrot green x 1.8cm diameter (Please note that this size is made with the needles & yarn specified below, different yarns and needles size will produce different results)
Needles:
Yarn:
Body — Creative Basics Hobby Knit Yarn (dye lot #2060)
Carrot Green — Lincraft Superwash 8ply in 3005 (dye lot #774749)
Facial Features:
scraps of dark brown thread for eyes and mouth & scraps of yellow thread for cheek
*Important* Please note that due to it’s tiny size, this is not a toy for small babies under 3yo due to potential chocking hazards.
Free Tiny Baby Carrot Knitting Patterns begins here:
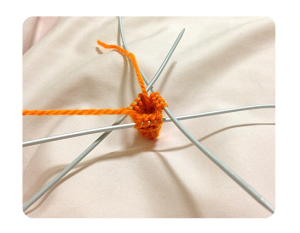
With DPN and Orange, CO 3. Divide 1 sts on each DPN. 
Round 1: Join. K
Round 2: *K1, M1* x 3 times (6 sts total)
Round 3: K
Round 4: *K2, M1* x 3 times (9 sts total)
Round 5: K
Round 6: P5, K4
Round 7: K
Round 8: *K3, M1* x 3 times (12 sts total)
Round 9: K
Round 10: K6, P6
Round 11-13: K
Round 14: P6, K6
Round 15: K (stuffed body now, ensuring the cast on tail is in the inside of the body also as you want to close off the body soon)
Round 16: *K2, K2tog* (9 sts total)
Round 17: K
Round 18: *K1, K2tog* 6 sts total) Stuffed body a bit more now so everything is tight.
Cut the Orange yarn, and leave approx 10cm tail for seaming at the end. Now, you want to repeat the Cool Carrot green tops procedure. I have written a detailed instructions with video tutorials on how to do the hair in my Cool Carrot post, please refer to it there.
The difference is that you may want to cut your yarns after you finished tying the slip knot so it’s easier to handle as you don’t want to cut it really short and having trouble tying the knots later on. After you finish tying the knots, I braid the hair using 3 strand braid technique, then I later trim the hair to desired length.
Feel free to link to this pattern by linking directly to this page. Pattern is not to be copied or reproduced without permission from the author. Items made from my pattern may be sold (as long as you credit me as the designer and always link it back to this blog “FreeCuteKnit.com” ![]() ), however this does not apply to business or corporation. Please contact me prior selling them at large scale. © Dina Wirawan
), however this does not apply to business or corporation. Please contact me prior selling them at large scale. © Dina Wirawan
 Remember, if you do make this tiny carrot, I would love it if you can share them with me by either sending me the photos via email for a chance to be featured in the blog/ tag me on Facebook / upload them in my Ravelry
Feeling generous today? You can support Free Cute Knit (any amount is highly appreciated) ♥:
![]()

